


Love: I can be creative. My students actually look back to them for help.
Hate: If I mess up, I have to throw the whole thing away and start a new one. If it doesn’t look pretty, I have to throw the whole thing away and start a new one.
I also prefer to write the anchor chart WITH my students, opposed to making it all ahead of time and “presenting” it to them — best practice tells us that our kids learn best when we create the chart together. But what if I mess up? The neurotic teacher in me can’t handle it… tell me I am not the only one.
Just this year, I started to create anchor charts in a different way. This new way allows me to make an anchor chart partly ahead of time, with student-teacher collaborated content, and I can RE-USE it, year after year. Be still my teacher heart.
HOW IS THIS POSSIBLE?! you ask. First, start by just making the ‘shell’ of your anchor chart. You know… the title, the little drawing, whatever it is that your students don’t need to take part in watching you write.
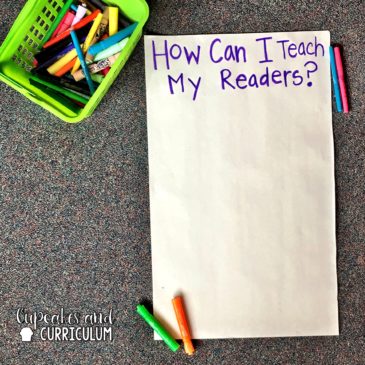
Then, laminate the ‘shell.’ There is something about laminating a huge chart that makes teachers all warm and fuzzy inside, right?
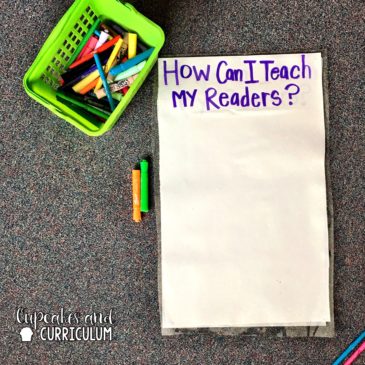
Now the content can go a few different ways… if your chart is something that your students need to actively take part in creating the content for, all you need to do is bring some post-it notes. Sit down for your lesson, and write your students’ ideas on the post-it — and stick! Voila.
If your chart is new learning that you are sharing with your students, you can create your post-it notes of info ahead of time. Even though you aren’t writing the content WITH your students, your anchor chart is being built piece by piece which is less overwhelming for our students to visually interpret.
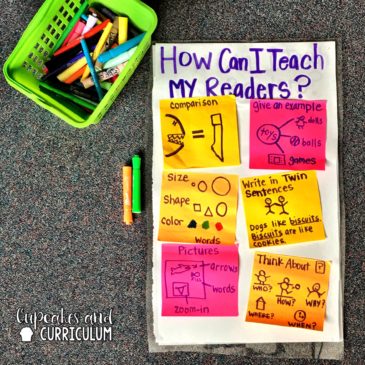
What I love about this method is that you can build your anchor chart over many days worth of lessons. This is especially true in my class during our Writer’s Workshop time. This anchor chart was 6 separate mini-lessons! Last year, I tried to create a chart for each of these post-it notes… not only did it just look awful, it was unorganized and I didn’t even have enough wall space to have them displayed all at once.
-> When I am finished with the chart, I can either remove the post-its and throw them away OR I can store them in a plastic baggie that I paperclip to the chart. I’m so excited for next year when I can just open up my classroom closet and pull out our informational writing anchor charts and have all of my mini-lesson charts ready to go. This will save me SO much time on prep!
-> My students are invested in each chart we make. They love the action of me sticking the post-it on the chart, believe it or not!
-> My students can see the organization of information being displayed on different post-it notes. They know that each post-it includes one important thing.
-> The colorful post-it notes grab their attention – seems like such a weird thing to get excited about for us adults, but those little ones sure love the bright colors.
-> If I am conferencing with a student, and they are struggling with a certain aspect of what was taught, I can recreate the post-it of information (not the whole chart!) and give it to them as a personal reference. This visual reminder is so helpful!
-> Think about your typical KWL chart – by creating the shell, laminating, and then just recording responses on post-its… you can use this chart all year long with different subject areas/content. Save the trees!
Do you currently re-use your charts? Do you create them with your students or do you create them ahead of time? I’d love to hear how you handle the anchor chart madness in your room 😉